
This post is a continuation of my earlier Getting Started with Puppet on Windows post (although most of the information in this post is OS agnostic). This post explores how you can make your Puppet manifests more dynamic via the typical programming constructs of variables, expressions, conditions and iteration. It also covers Puppet’s Facter tool (for simplifying the interrogation of system info) and Hiera mechanism (for separating configuration data from your code).
As with my previous post, my primary source of information was the excellent Puppet 5 Beginners Guide (Third Edition) book by John Arundel which I highly recommend.
Variables, Arrays and Hashtables
In Puppet variables start with a $ followed by a name that must begin with a lowercase letter or an underscore. The rest of the name can contain uppercase or numbers.
Boolean values true and false are set by providing them as bare values (e.g not quoted). Note that they are not interchangable with their string equivalents ($something = true is not exactly the same as $something = 'true').
You can include a variable within a string via string interpolation. It works like this:
$my_name = 'Mark'
notice("Hello, ${my_name}! Nice to meet you.")
The
noticefunction in a puppet manifest outputs an information message to the console. It can be a useful way to troubleshoot manifests as you can use it to see the contents of a variable at a given point.
Arrays are defined and accessed via square brackets, and the first item index starts at 0:
$array = [1,2,3,4,5]
$firsttime = $array[0]
You can provide array input to titles as an easy way to trigger iteration. For example:
$software = [
  'mysql',
  'atom',
  'sysinternals',
]
package { $software:
  ensure   => installed,
  provider => chocolatey,
}
Hashtables are defined and accessed like this:
$scores = {
  'mark'  => 220,
  'steve' => 180,
  'bob'   => 30,
}
notice("Mark's score is ${scores['mark']}.")
You can do splatting of attributes via the attribute splat operator which is a *:
$attributes = {
  'owner' => 'administrator',
  'group' => 'Administrators',
  'mode'  => '0644',
}

file { 'c:/temp/hello.txt':
  ensure => present,
  *      => $attributes,
}
#Expressions
Puppet supports all the usual arithmetic operators, e.g + - * and / and you can use brackets to specify order of operations:
$value = (10 * 4) + (12 / 3) - 1
notice($value)
Comparison operators are as follows:
<less than, e.g9 < 10>greater than, e.g11 > 10>=greater than or equal to<=less than or equal to==is equal to e.g'foo' == 'foo'inwhich can be used in several ways e.g'foo' in 'foobar'substring within a string'foo' in ['foo','bar']item within an array'foo' in { 'foo' => 'bar' }key within a hashtable
=~matches a regular expression, e.g'foo' =~ /oo/or a specified type, e.g'foo' =~ String1 != 2not equal
If and Case statements
The structure for an if..else statement is as follows:
if $something {
   ..do something..
} else {
   ..do something else..
}
If you need to decide between more than two options, you can use case:
case $something {
  'thing1': {
     ..do thing 1..
  }
  'thing2': {
     ..do thing 2..
  }
  'thing3': {
     ..do thing 3..
  }
  default: {
     ..do default thing..
  }
}
Iteration
Puppet include an each function for performing iteration. This takes an array input and applies a block of code to each element of the array. For example:
$files = ['file1','file2','file3']

$files.each | $file | {
  file { "c:/temp/${file}.txt":
    ensure  => present,
    content => "I am ${file}",
  }
}
You can see that each item in the array is sent to the $file variable when we can then use within the code block to represent the current item. Similarly you can iterate over hashtables by providing two parameters. For more information on iteration see here.
Facts
You often need to know something about the system Puppet is running on to make a decision or to appropriately configure an attribute. Puppet gives you easy access to this sort of information via the $facts hashtable variable. For example you can access the ‘kernel’ fact via
$facts['kernel']
Which will return windows on a windows machine.
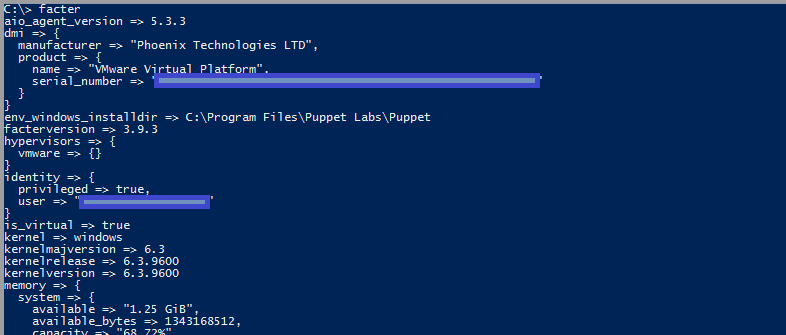
From the command-line you can use the facter command to explore the facts. Running it on its own will return a series of hashtables of all the facts on the system. Note that there are often nested hashtables:
You can provide a specific fact name to return just that config, e.g facter os or if you want to access sub properties, use a dot as a separator. e.g:
facter memory.system.available
To access sub properties within your manifest via the $facts variable you specify multiple key names like this:
$facts['os']['release']['major']
You can extend the $facts hashtable by adding external facts. The simplest way to do this is by adding one or more text files to the \facts.d directory. On Windows that can be found here:
C:\ProgramData\PuppetLabs\facter\facts.d
For example, if we create a text file named datacenter.txt in that directory with the following content:
datacenter=NewYork
You may need admin rights to save to the
facts.dfolder by default.
Then your fact will be immediately available to facter and via the $facts variable:

You can put multiple facts in a single text file and/or have multiple files. Puppet will simply read all the files in that directory and extract all the key=value pairs. You can also create more complex facts using the YAML or JSON structured data formats.
You can also create executable facts where Puppet executes a script to retrieve the fact. This can be via a cmd or PowerShell script, or by using Ruby. Beware that per this article, Ruby is generally the best option from a performance perspective as there is less overheard vs using PowerShell. Another consideration is whether the executable fact needs to be regenerated every time Puppet runs. If it can instead be generated less frequently, consider having a separate scheduled task run the script and write the result to a text file as a custom fact.
Hiera
Hiera is Puppet’s mechanism for separating your configuration data from your code. This is desirable because once your Puppet manifests get moderately complex maintaining your settings as they evolve over time can be time consuming and difficult. Hiera aims to solve this by acting as a centralised database where Puppet can instead look up and retrieve your configuration settings.
Hiera allows you to store your configuration data sources as YAML, JSON or HOCON text files. You then query the database from your manifest using the lookup() function, which you pass the name of the key you want to retrieve and the data type you expect the result to be. For example:
file { lookup('temp_dir', String):
  ensure => directory,
}
Specifying the data type in the lookup is optional, but is good practice as it can help catch mistakes, such as if you had looked up the wrong key which then returned a different data type.
Hiera looks up data by following a heirarchy - an ordered list of your data sources. You configure hierarchies in hiera.yaml. Here is an example:
---version: 5

defaults:
  datadir: data
  data_hash: yaml_data

hierarchy:
  - name: "Host data"
    path: "nodes/%{facts.hostname}.yaml"
  - name: "Common defaults"
    path: "common.yaml"
Puppet will check for these (under the folder defined by datadir: which is \data by default) in order to find a match for the item being looked up. You can also see in the example above that you can interpolate variables such as those in $facts in to these paths to make this list more dynamic.
A YAML hiera data file might look like this:
---monitoring_server: '1.2.3.4'
monitoring_ips:
  - '10.20.30.40'
  - '10.20.30.41'
  - '10.20.30.42'
  - '10.20.30.43'
server_config:
  updates_enabled: false
  dhcp_enabled: true
This example demonstrates three different data structures as defined in YAML:
monitoring_serveris an example of a single valuemonitoring_ipsis an example of an array of valuesserver_configis an example of a hash with two key/value pairs.
When these are retrieved via lookup() these will be converted to the equivalent puppet types.
You can also interpolate Hiera data within the Hiera data itself. For example:
ips:
  home: '1.2.3.4'
  office: '10.20.30.40'
rdp_allowed_ips:
  - "{lookup('ips.home')}"
  - "{lookup('ips.office')}"
Doing this reduces the number of places an item of data needs to be declared within the Hiera file, reducing the number of places it might need to be updated in the future. Beware however that when doing this via lookup the result is always a string. If you need to interpolate a hash, array or boolean value you need to use the alias() function instead, like this:
ping _allowed_ips: "%{alias('rdp_allowed_ips')}"
Finally because % is a special character, you need to use the literal() function if you want to include it literally. For example to write %{HTTP_HOST} as Hiera datta you need to do:
%{literal('%')}{HTTP_HOST}
Summary
This was just a brief introduction to these topics to show how you can include programmatic features in your Manifests to make them dynamic as well as how you can start to utilise system data via Facts and separate and centralise your system specific settings away from your resource declarations via Hiera.
If you’d like to learn more about these topics, have a look at these official documentation pages:


Comments