
This blog post describes some initial steps you can take to learn Puppet, particularly to control Windows machines. I’m currently learning Puppet via the Puppet 5 Beginners Guide (Third Edition) book by John Arundel.
The book provides you with a Vagrant Ubuntu VM in order to experiment with Puppet. Below I have recreated some of the examples from the book but with minor changes necessary for them to work under Windows. It should therefore (hopefully) serve as a good initial guide to getting started with Puppet for controlling Windows machines. That being said I strongly recommend you also get the book, which is excellent and goes much further than I will cover below.
Installing the agent on Windows
Before you can start using Puppet, you need to install the Puppet agent on Windows. Puppet supports master/slave and master-less architectures, the latter of which is simpler for testing purposes.
It should probably go without saying that Puppet is a tool with the power to make significant changes to your machine (both constructive and destructive). As such I strongly recommend you use an isolated testing machine for playing with Puppet.
To install the Puppet agent on a Windows machine you simply need to:
- Download the MSI installer.
- Run/install using all defaults.
To check it’s installed and working you can:
- Open a PowerShell window (as administrator).
- run
puppet config print configto output puppet’s configuration file path. - run
puppet config print modulepathto output the default module directory paths.
- run
Hello, Puppet
As used in the Puppet 5 Beginners book, a good first example of the general syntax for Puppet is the following, which simply sets a text file to “hello, world”:
file { 'c:\temp\hello.txt':
  ensure  => file,
  content => "hello, world\n",
}
If you copy this in to a text file and save is as hello.pp you will have written your first puppet manifest (congratulations!).
To execute it, open a PowerShell window, change to the directory you saved the .pp file in and then run the following:
puppet apply hello.pp
You will see Puppet start and compile a catalog for your manifest. Puppet will then check if hello.txt exists under c:\temp. If it doesn’t exist, it will create it. If the content of the file is not the text “hello, world” followed by a new line, it will modify it to be as such (note, any existing contents will be replaced entirely).
In case you are not aware, Puppet is an example of an idempotent configuration management tool. As such it will only make the minimum changes necessary to bring the system in to the state declared in your manifests. Once hello.txt exists with the content we defined Puppet will not attempt to change/rewrite it unless a subsequent run finds it to be out of compliance with your declarations.
Resources
The syntax shown above is a resource declaration and the syntax for these is always this:
RESOURCE_TYPE { TITLE:
  ATTRIBUTE => VALUE
}
The RESOURCE_TYPE is how you tell Puppet the type of resource you’re declaring. There are a large number of built-in resource types and the Puppet 5.3 ones are listed in a single page here.
Resource Types include things like:
- exec
- file
- group
- host
- interface
- notify
- package
- scheduled_task
- service
- user
- ..and many more (including the ability to make custom ones).
The TITLE is the name that puppet uses to identify the resource internally. Every resource must have a unique title. With file resources this is typically the full path to the file (which is therefore unique by nature).
The attributes describe how the resource should be configured. These vary by resource (and there are more for file than were shown above). All resources support ensure but the possible values for it vary by resource.
Performing a dry run
You can get Puppet to show you what it would modify without actually performing those changes by adding the --noop flag:
puppet apply --noop your_file.pp
If the file existed but would be modified by Puppet the above would only show you that the MD5 hashes of the files were different than what it expected it to be.
To see what actual changes it would make to files, you can add the --show_diff switch. However while this simply works on a Unix system, for Windows you need to have a 3rd party diff tool and the Puppet diff setting to be properly set.
Packages
While managing files is cool, managing packages is cooler. To do this you use the puppet Package resource. On Windows by default this can be used to execute .msi or .exe installers like so:
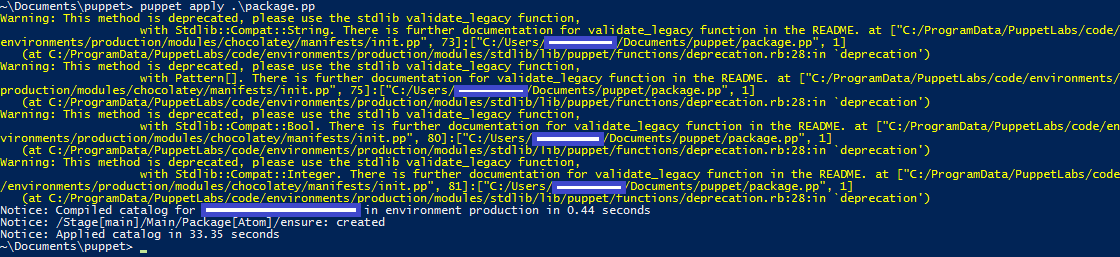
package { 'Atom':
  ensure   => installed,
  source   => 'C:/Installers/AtomSetup-x64.exe',
}
It’s generally best practice to use forward slashes in paths as shown here because it’s easy with a backslash to accidentally end up escaping a character by mistake. Another option is to use double quoted strings and then double each of the back slashes.
Alternatively if you install the Puppet Chocolatey module you can use Chocolatey as a package provider.
You can manually install the Chocolatey Package provider as follows:
puppet module install puppetlabs-chocolatey --version 3.0.0
Then add it to your puppet manifest by including the following line:
include chocolatey
at the top. You can then use chocolatey to install a named package by referring to it in the title field, and ensuring you specify chocolatey as the provider:
package { 'Atom':
  ensure   => '1.23.3',
  provider => chocolatey,
}
Up to now you might have been writing your puppet manifests with something like notepad. I recommend using Atom as it’s a much more powerful editor. We could of course download it’s installer and install it manually, or if you’ve already followed the above you’ve just installed it with Puppet.
If we want to use Puppet to remove some software, we can change ensure to be ensure => absent. You can use ensure => latest to always get the latest available version, but it’s generally considered best practice to specify a specific version so that your packages aren’t being automatically updated whenever the source version changes.
When you want to remove something with Puppet it’s important to remember to change it’s configuration to be
ensure => absentand then to apply that via Puppet. Simply removing the configuration for something from the file is not going to uninstall/remove it, it just removes Puppet from evaluating/controlling it. This is true for all resources.
If you want to see what version of a package Puppet thinks is installed, you can use the Puppet Resource tool:
puppet resource package atom
This will output a Puppet manifest with the current state of the named resource. In fact if you don’t specifcy a specific title you get a manifest for all resources of that type. Try puppet resource package for example.
Beware the
titlefield (and other fields) in your manifest can be case sensitive. I was originally referring to Atom as ‘atom’ in myPackagedeclaration, but doing so stoppedensure => 'absent'from working. When I ranpuppet resource package atomI could see that Puppet was identifying it as ‘Atom’.
Services
The next kind of resource you might want to manage is services. Predictably, this is done with the service resource type:
service { 'wuauserv':
  ensure => running,
  enable => true,
}
The above will ensure the Windows Update service is always running and enabled.
On Windows you need to use the short name for the service, not the display name (e.g
wuauservnotWindows Updates).
Service is an example of a fairly generic Puppet resource. The declarations are very similar on Unix or Windows and Puppet knows what underlying provider to call in the OS to manage the services. On Windows, that is net.exe which should always be present by default.
Puppet Describe
Puppet has a built-in tool to help you discover all of the different attributes associated with a resource called Describe. For example:
puppet describe service
Returns a description of the service resource and a complete list of all the attributes and their associated valid values.
To see a list of all available resource types you can enter:
puppet describe --list
Package-file-service Pattern
Now that you know how to manage files, packages and services you have the three tools that in general allow you to manage software. This is referred to as the ‘package-file-service pattern’.
Here’s an example:
package { 'mysql':
  ensure   => installed,
  provider => chocolatey,
  notify   => Service['mysql']
}

file { 'C:/mysql-5.5/mysql.cnf':
  source => 'c:/source/mysql.cnf',
  notify => Service['mysql']
}

service { 'mysql':
  ensure => running,
  enable => true,
}
This uses package to install MySQL, file to make changes to it’s configuration file and service to ensure it’s running.
The example above also introduces the notify attribute. This is a way to define dependencies between different parts of your configuration. It ensure that if the package or configuration file change that the service is also restarted. Puppet wouldn’t do this by default because the service would already be running so (due to idempotency) it would see no reason to modify it’s state. Using notify in this instance ensures that config or install changes take an immediate effect by also restarting the service. It performs a restart because that is the default action performed on a service when it is notified.
Users and Groups
You can use the puppet user resource type to manage local users and groups (whether you should though is worth considering). You can’t use this to manage domain users, but you can define domain users to be members of local groups.
The following will create a group named ‘Avengers’ and a user named ‘TonyStark’:
group { 'Avengers':
  ensure => present,
}

user { 'TonyStark':
  ensure => present,
  password => 'password123',
  groups => ['Avengers'],
}
Depending on your local security policy you will need to specify a password of a certain complexity.
Under Unix you can specifiy gid and uid properties respectively to ensure that the unique ID for users and groups are consistent across systems. You can’t do this on Windows, these properties are visible via puppet resource user <name> but are read-only.
Scheduled Tasks
The scheduled_task resource can be used to create Windows Scheduled Tasks. This is the equivalent of cron in Unix. The book suggests using cron to set up a routine task to apply your puppet manifests. This is how you might use Puppet in production to ensure your systems remain compliant on a routine basis. This isn’t strictly necessary in a Windows environment as by default Puppet Agent runs as a service and applies the manifests every 30 minutes.
The Puppet 5 Beginners book also suggests that (for a master-less setup) you store your puppet configuration in a source control system like Github and then as part of this task pull the latest changes from the repository with Git before running
puppet apply.
If you didn’t want to utilise the Windows service, below is how you can use Puppet to create a scheduled task to routinely apply any puppet configuration files that exist in the folder C:\Puppet:
scheduled_task { 'Run Puppet Every 5 Minutes':
  ensure    => present,
  enabled   => true,
  command   => 'C:/Program Files/Puppet Labs/Puppet/bin/puppet.bat',
  arguments => 'apply C:/puppet',
  working_dir => 'C:/Program Files/Puppet Labs/Puppet/bin/',
  trigger   => {
    schedule   => daily,
	start_time => '08:00',
    minutes_interval => 5,
    minutes_duration => 60,
  }
}
You may also need to configure this scheduled task to run as a user with elevated permissions, particularly if your Puppet manifests are managing packages.
Executing Scripts
The Exec resource allows you to execute a command or script. Here is an example:
exec { 'do-something':
  command => 'C:/something.exe'
}
This is a little different to the other resources which model some concrete state of the system, while exec can run any arbitrary command or script. This might change the state of something or it might not.
As a result Puppet (ideally) needs a way to know whether it should trigger the exec. This is done via either a creates, onlyif or unless attribute.
creates =>specifies a path or file that should exist after theexechas completed successfully. If this exists then it acts as a flag to Puppet that it doesn’t need to be run again unless it does not exist.onlyif =>specifies a command for puppet to run and the exec is executed if it returns a success (zero) exit status.unless =>is the opposite ofonlyif. The command specified causes theexecto be triggered unless the command specified returns a success (zero) exit status.
Without one of these conditions, the exec will run on every run of the puppet file which is generally undesirable.
Another way to control an exec resource is to add a refreshonly => true attribute. When this is present the exec will only execute if another resource triggers it via the notify attribute.
Because it is difficult for Puppet to know the state of things changed by exec you should use it with care and consider whether creating a custom resource type might be better.
Summary
Hopefully this guide has given you a useful Windows-centric starting point for Puppet. Beware the above is only a partial summary of what is covered in just the first four chapters of the Puppet 5 Beginners Guide (Third Edition) book, so again I strongly recommend you pick it up, even if your focus is on Windows.
Here are some further links specific to Puppet on Windows that you might find useful:


Comments