
In my previous post I talked about creating a Powershell function to lookup terms in a large internal glossary I had collated. This post takes this a step further and creates a custom slash command integration in a Slack chatroom that calls out to a Powershell-based Azure Function to query my (now) Azure hosted glossary.
Azure Functions is currently in Preview. It’s also open source which is awesome. If you’re familiar with AWS, Azure Functions are Microsoft’s answer to Lambda, i.e serverless computing.
Slack is a real-time group messaging tool that extends the traditional chat room with an endless array of integrations, empowering a movement known as ChatOps.
While my glossary lookup Powershell cmdlet was useful to me, it wasn’t easy to share and I couldn’t really see others wanting to search the glossary via the console. However my company does make use of Slack (albeit somewhat sporadically) and this is something I want to encourage my team to adopt. I also wanted to see how easy it might be to build these kinds of integrations.
Registering an Azure account
If you don’t yet have an Azure account, you simply need to register one (for free). In fact it’s probably worth noting from the outset that all of what i’m about to describe is cost free (within the Trial of Azure certainly) and you’re only likely to start incurring cost with Functions once you’re doing something complex that is being called hundreds of thousands of times in a month or (seemingly) if you store files within the Functions. See the pricing calculator for more details).
- Go to https://azure.microsoft.com/
- Click “Start for free” (and again on the next page)
- Sign in with a Microsoft user account (or create one).
- Complete the registration (if your experience is like mine this will require validating your human-credentials via a mobile number and credit card - which they ensure you they will not charge while you are on the free tier).
You should now have an Azure account with £125 of credit (valid for 30 days, and after this time if you want to keep it alive you will just need to switch the account to pay-as-you-go or another payment plan, which should still incur little or no cost).
Creating your Function App
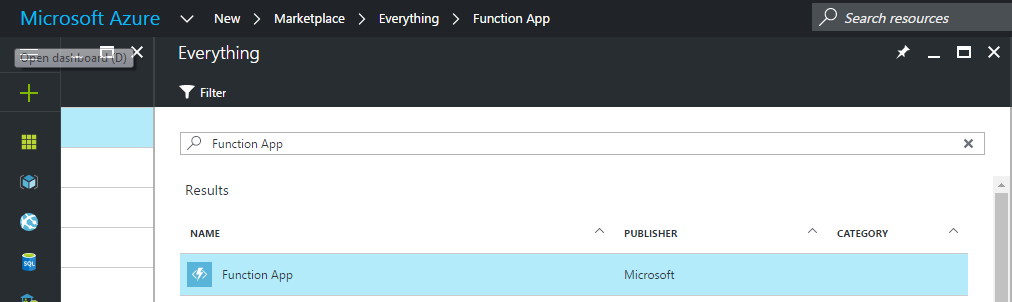
- In the portal, click + New and search for “Function App”.
- Click on Function App then the “Create” button.
- Enter a name for your app, which will be used to create a yourname.azurewebsites.com address.
- You need to enter a name for Resource Group, unless you have an existing one you’d rather use.
- Most of the other defaults here can probably be left alone, so when happy click “Create”.
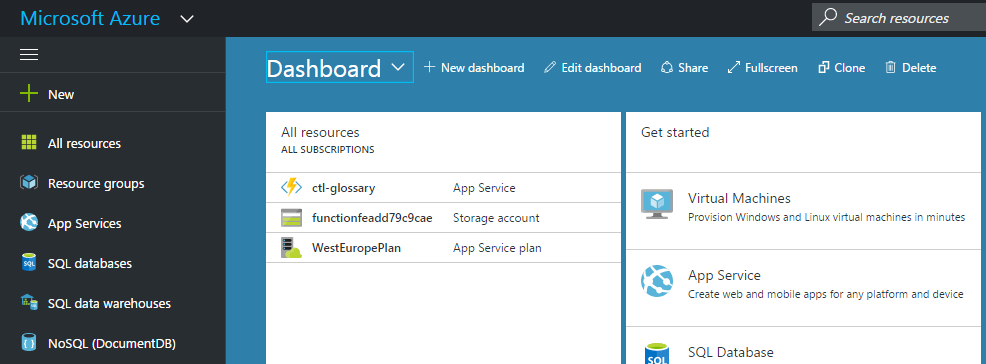
Your function app will now start deploying and you can monitor the progress of this via the notifications area top right. When it’s finished, you should find it listed under “All Resources”.
Creating your Function
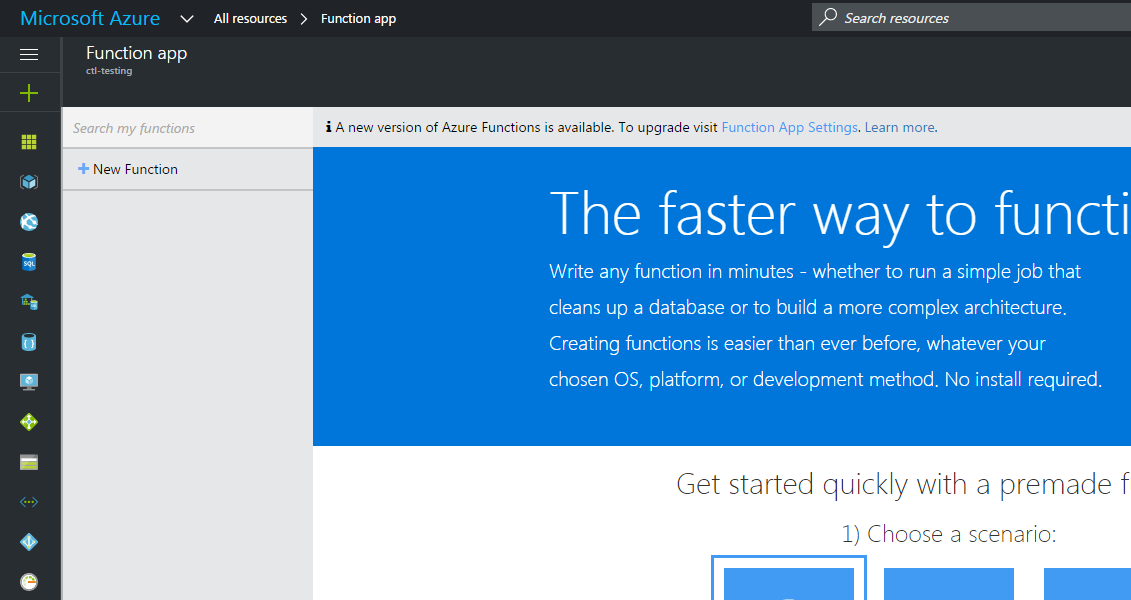
If you have clicked in to your Function App resource, you should see the interface above. Ignore the “Get started quickly” page, as it only offers you C# or Javascript. Instead:
- Click + New Function
- From the drop-down choose the Language “Powershell”.
- Click “HttpTrigger-Powershell”.
- Enter a name for your Function.
- Leave the Authorisation level as “Function” which will mean that there will a function specific key generated that will be needed with API calls for security.
- Click “Create”.
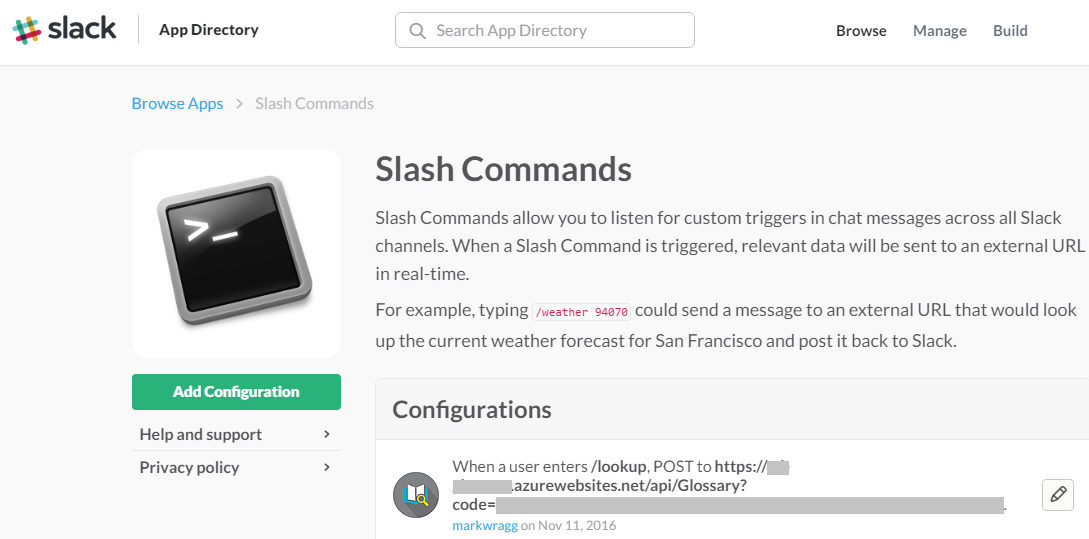
Configuring the Slash Command in Slack
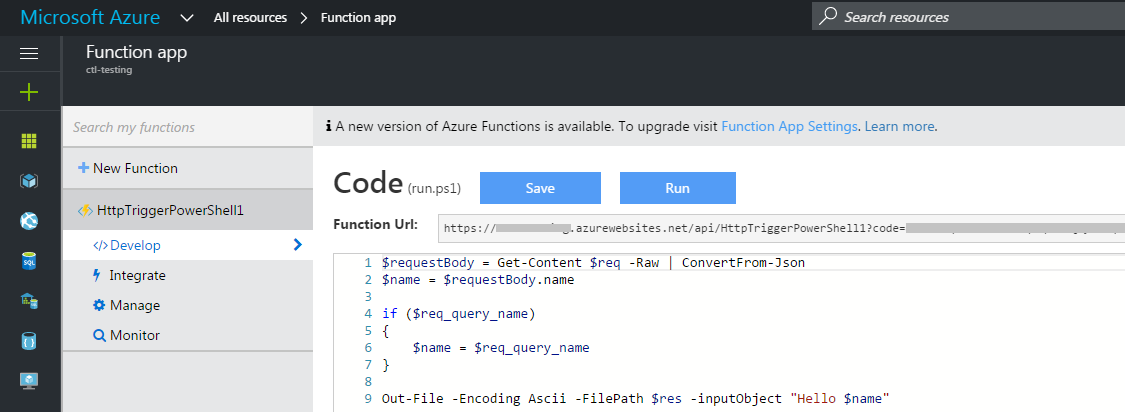
Now is a good time to set up the slash command configuration in Slack, because we can then use it for testing. We also now have the API URL that we want Slack to post to (this is the Function URL as you can see in the screenshot above).
- Log in to your Slack account via a web browser (if you don’t have a Slack account, you can create one for free).
- Go to Build and then click “Make a Custom Integration”.
- Click Slash Commands.
- Enter the name for your command (e.g /lookup) and click “Add Slash Command Integration”.
- Scroll down to the Integration Settings section. Go back to Azure and copy the “Function URL” in to the URL box of the Integration.
- All the other defaults are OK, but you might want to make changes to “Customize Name”, “Customize Icon” and “Autocomplete help text” to make your integration a little friendlier.
- Make sure you click Save Integration when you’re done.
Configuring your Function
Switch back to your Function in Azure. There’s some default/sample code which is helpful to review and try to understand. All you really need to know at this point is that whatever Slack submits to our Function URL will be deposited in to a default variable named $req.
The default code here takes the contents of this variable and pipes it to ConvertFrom-Json (assuming that the input its receiving is in JSON format). This isn’t the case (for reasons I don’t know) in Slack, so this is the first thing that needs to go.
Slack does a POST request, which results in the Function receiving the variables as an ampersand separated list. I found an easy way to turn this back in to a Powershell object is to do the following:
$requestBody = Get-Content $req -raw
$requestBody = $requestBody.Replace('&',"`n")
$requestBody = ConvertFrom-StringData -StringData $requestBody
As an aside, if you want to see for yourself what Slack submits to the Function, you can simply turn it around and send it back by doing the following:
$requestBody = Get-Content $req -Raw`
Out-File -Encoding Ascii -FilePath $res -inputObject $requestBody
Here’s an example of the response of doing that as seen in Slack:
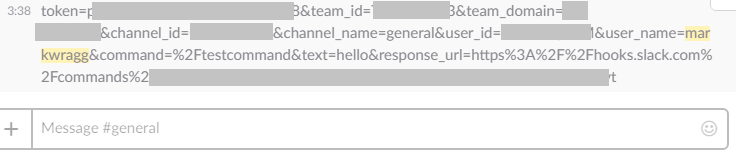
Further, it’s worthwhile copying this message, returning to your Azure Function where if you click “Test” top-right, you can paste this in to the “Request body” box and use it for testing (by hitting the “Run” button on the function and seeing the result in the Output box.
/Aside
Having got the Slack POST in to a Powershell object, next we need to search our Glossary for a match. But currently the Glossary isn’t online anywhere. There’s plenty of options for this (Azure Blob Storage, S3, probably OneDrive all likely good options). An equally simple solution is just to upload your file to the Function as follows:
- Click “View Files” top right
- Click Upload.
- Select your local Glossary.csv file (note that if you’re playing along this needs to be a CSV file with at least “Term” and “Description” as headers and ideally some contents).
This is the only place where I seemed to have incurred some cost from my Azure trial free credit (currently I’ve apparently spent a financially crippling £0.02 on storage writes. I imagine if I were to store my CSV in OneDrive or somewhere else I would get round this (and keep the solution completely cost free), but I have not yet tested.
Having uploaded the file in to the function, it is available here: D:\home\site\wwwroot{yourfunction}{yourfile}.csv so we can now do this to query it:
$Response = (Import-CSV "D:\home\site\wwwroot\Glossary\Glossary.csv") | Where-Object {$_.Term -like "$($requestBody.text)*"}

if(!$Response){Out-File -Encoding Ascii -FilePath $res -inputObject "Sorry, there is no match in the Glossary for *$($requestBody.text)*."}
And we can send back to Slack one or more matches as follows:
$Response | ForEach-Object{
    Out-File -Encoding Ascii -FilePath $res -inputObject "*$($_.Term):* $($_.Description)" -Append
}
The Result
Here’s what the result looks like from Slack (I tested by searching my Glossary for “FC” by typing /lookup FC for which there are multiple matches:
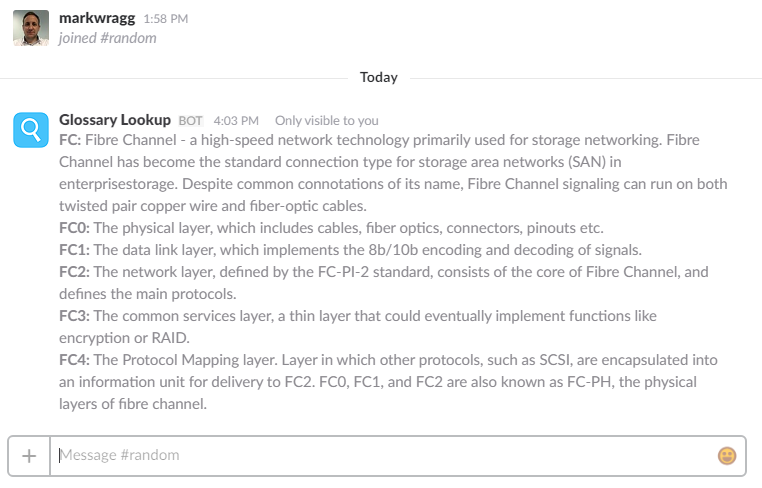
Note that it says “Only visible to you”. If you wanted to write a slash command that had results visible to all users, we could change the Azure Function code so that it posts back to the room via an Incoming Webhook.
For ease of anyone looking to copy the Function code, here it is in full:
Caveats
The above is a relatively simple solution in the hopes that it demonstrates how you can use Azure Powershell Functions to drive Slack integrations and is helpful to anyone for whom Powershell is a language of choice.
There are a couple of Caveats that I want to note (all of which are resolvable with more development or as noted):
- The “command” passed from Slack is URL encoded, so you need to unencode it if you want multi-word searches (or searches with special characters) to work as expected (otherwise a space characters is a + etc.).
- On the current plan, the Function App goes to sleep after a while and it takes a call then 10+ seconds to wake it up (which means you can end up calling the command multiple times from Slack before it responds). The quickest/easiest way to work around this is to use a web based monitoring tool such as StatusCake or Pingdom to just hit the URL of your function every 15 minutes or so which effectively keeps it alive. Alternatively if you’re not using the Free or Shared plans you can enable “Always On” for your Function as described here.
You also might want to look in to presenting the information returned from your functions in a nicer way using the more advanced attachment based message format that Slack provides.


Comments