
I have previously blogged about how you can use Influx, Grafana and PowerShell to build and populate metrics dashboards for visualising data from multiple sources. This blog post details how you can use Terraform to quickly and easily deploy Grafana and Influx on a Windows instance in AWS as a proof of concept implementation of these tools.
If you’d like to go directly to the code, you can find it here: https://github.com/markwragg/Terraform-MetricStack
What is Terraform?
Terraform is a tool that you can use to define infrastructure as code. You use one or more providers to define the resources (infrastructure components) that you want to be deployed and then Terraform makes the required changes in those services (such as AWS) to implement your infrastructure. Terraform then records the state of the infrastructure, so any further changes you want to make to your infrastructure via Terraform are made through minimal changes. By using a tool like Terraform you can automate and version control your infrastructure.
Before we look at the code, it’s worth noting the following caveats:
- I describe this as a “proof of concept implementation” because if you want to use these tools in production you will likely want to implement them in a way that is more scalable and resilient. For example, Influx provide their own Terraform module for deploying InfluxDB across multiple nodes.
- Both Influx and Grafana can be installed on a Unix OS and it’s likely more sensible to do so from a performance and cost perspective. I chose to implement it on Windows in this instance mostly to see how complex it would be.
- The deployment code does some minimal configuration of Grafana and Influx. To do more detailed configuration you could RDP to the server and make further changes, or look to implement a configuration management tool to manage the configuration files more fully.
- If you have an AWS account with Free Tier then the defaults defined in my Terraform code should not incur you any AWS costs. If you do not have Free Tier then minimal costs may apply.
Getting Started
- If you don’t have an AWS account, you can sign up for one free here.
- You need to create an access key in AWS to grant Terraform permissions to your account.
- You need to configure the access key locally. I recommend installing the AWS CLI tools and then doing
aws configureto set your credentials. You then don’t need to explicitly add your access key to the Terraform code, Terraform will discover it automatically. - You need to install Terraform. Terraform is a single executable, so its just a case of downloading the appropriate package for your system and putting it somewhere accessible (like one of the default PATH directories, or in a directory that you then add to PATH).
To use my code you then simply need to:
- Clone the repository to your local machine.
- Open a terminal/shell and change to the directory with the code.
- Run
Terraform Init. This will download any plugins required by the code (and you only need to do this the first time). - (Optionally) run
Terraform Planto view what configuration changes the code will make. - Run
Terraform Applyto see the Plan again and then enter “yes” to start the deployment. - Terraform will also prompt you to provide a value for
admin_password. Whatever you define will be used to set the password for the local admin account on the Windows server so that you can RDP to it if you want to.
It will likely take just a few minutes to complete the deployment, at the end of which it will output the URL for Grafana and the URL for writing metrics to Influx. However, (because we’re using a T2.micro instance by default) you need to wait a bit longer before Grafana and Influx are ready as the server will still be downloading, installing and configuring them. Usually within about 20 minutes the Grafana URL will respond and not long after that Influx should also be working.
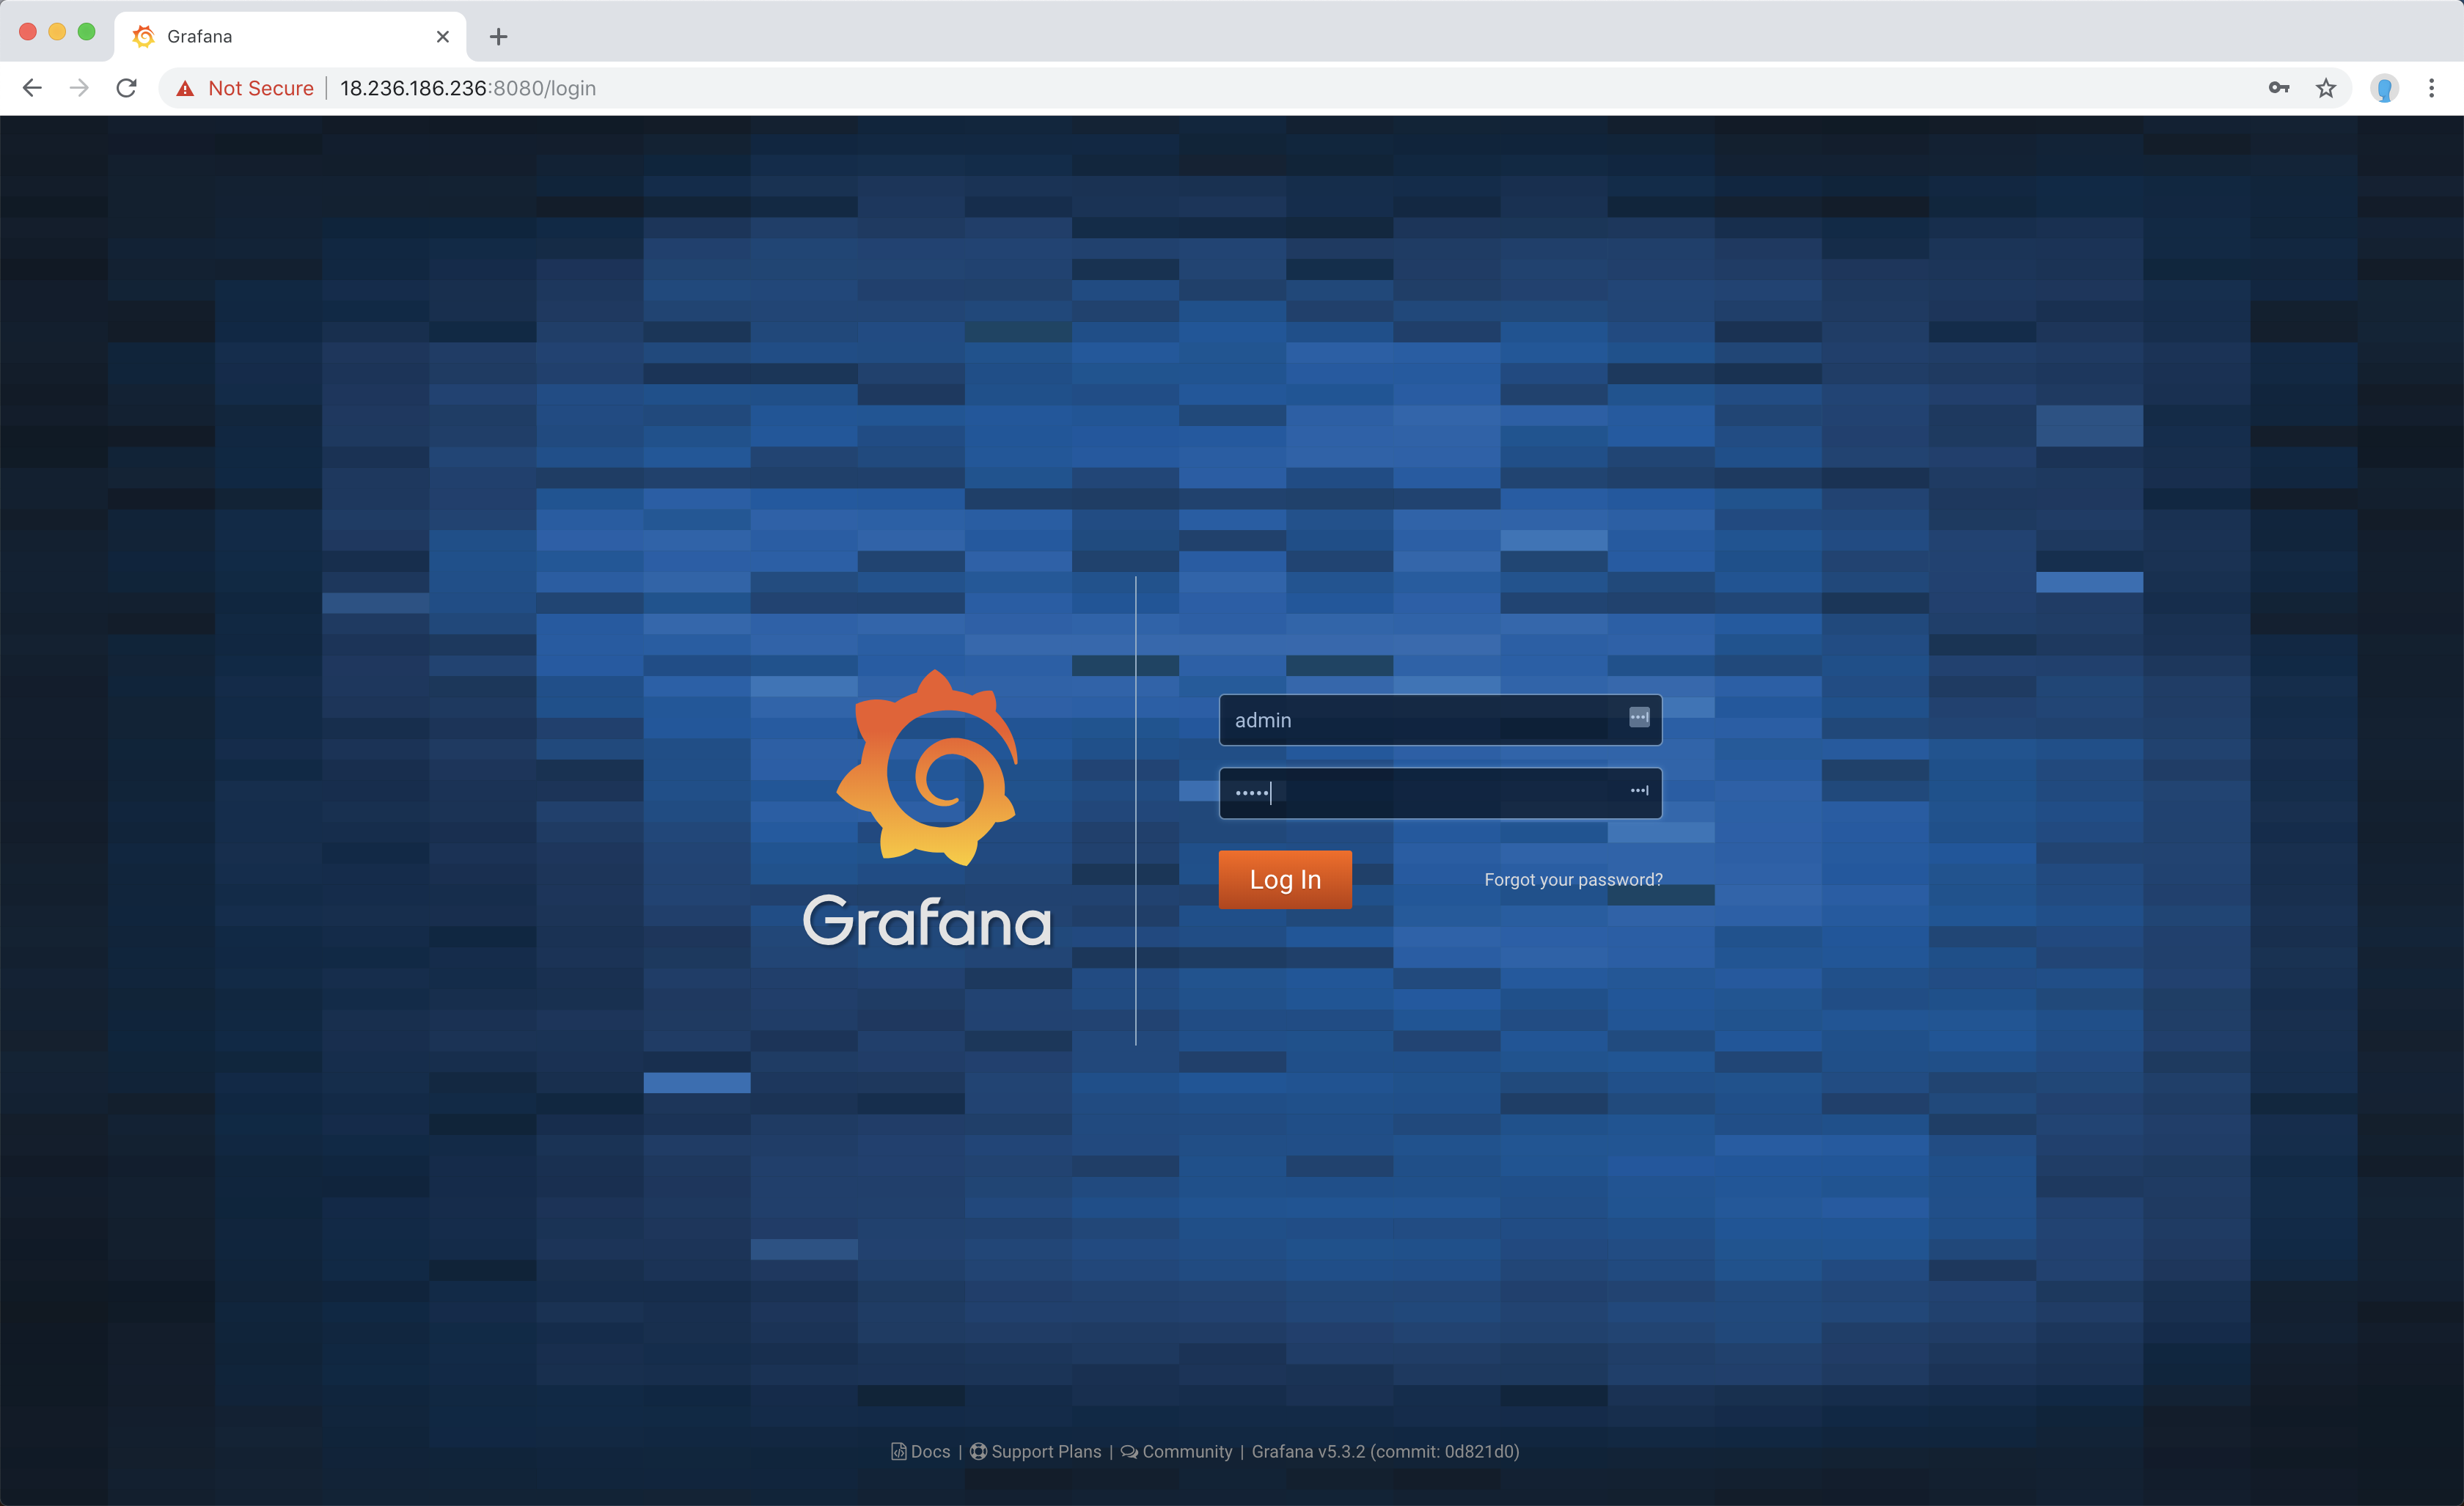
Once the Grafana URL is working, you should get to a login page and initial credentials are the defaults (at time of writing admin / admin):
Have a look at my previous blog post for how you can now write some metrics into Influx (using my Influx PowerShell module if you want to) and visualise them with Grafana.
You can skip over the initial parts of the blog post which cover installing Influx and Grafana, as Terraform has just done that for you :).
The Code
The main Terraform code lives in main.tf. It starts by defining that we want to use the AWS provider in order to manage AWS resources, and specify the region we want to deploy to via a variable:
provider "aws" {
  region = "${var.aws_region}"
}
Then we define a data source which loads the user_data we need to send to our AWS instance from a separate file. You can define the user_data within the resource directly, but having it in a template file is neater. The user_data is scripts that we want to run on the server after its deployed in order to configure it. There are a number of parts of the script that can be modified via the code’s variables (which I’ll cover shortly), so to make use of these we need to provide a block of them via vars:
data "template_file" "metricserver" {
  template = "${file("metricserver.tpl")}"

  vars {
    admin_password      = "${var.admin_password}"
    grafana_port        = "${var.grafana_port}"
    grafana_version     = "${var.grafana_version}"
    influx_port         = "${var.influx_port}"
    influx_database     = "${var.influx_database}"
    influx_version      = "${var.influx_version}"
    influx_udp_port     = "${var.influx_udp_port}"
    influx_udp_database = "${var.influx_udp_database}"
  }
}
This next data source is used to get the AMI (Amazon Machine Image) ID from AWS. New AMIs are released all the time (with that latest patches etc.) so by using this data source we ensure we are always using the latest one. This data source also makes use of a variable in which we specify a partial AMI name. By default this is Windows 2016 Core:
data "aws_ami" "windows" {
  most_recent = true
  owners      = ["amazon"]

  filter {
    name   = "name"
    values = ["${var.windows_ami_filter}"]
  }
}
Now we start to declare our resources. The first is an aws_instance and you can see that it’s referencing the data source for it’s AMI. We load the instance_type from a variable (T2.micro by default) and then we have the instance associated with a security_group which is defined lower down. Note how the resources don’t need to be written in any particular order, Terraform will work out the dependencies itself and deploy things in the correct order:
resource "aws_instance" "metricserver" {
  ami             = "${data.aws_ami.windows.id}"
  instance_type   = "${var.instance_type}"
  security_groups = ["${aws_security_group.metricserver_inbound.name}"]

  user_data = "${data.template_file.metricserver.rendered}"
}
Next is the aws_security_group resource definition, which is very basic as we’re defining the rules as separate resources below it:
resource "aws_security_group" "metricserver_inbound" {
  name        = "metricserver_inbound"
  description = "Allow inbound traffic to metricserver"
}
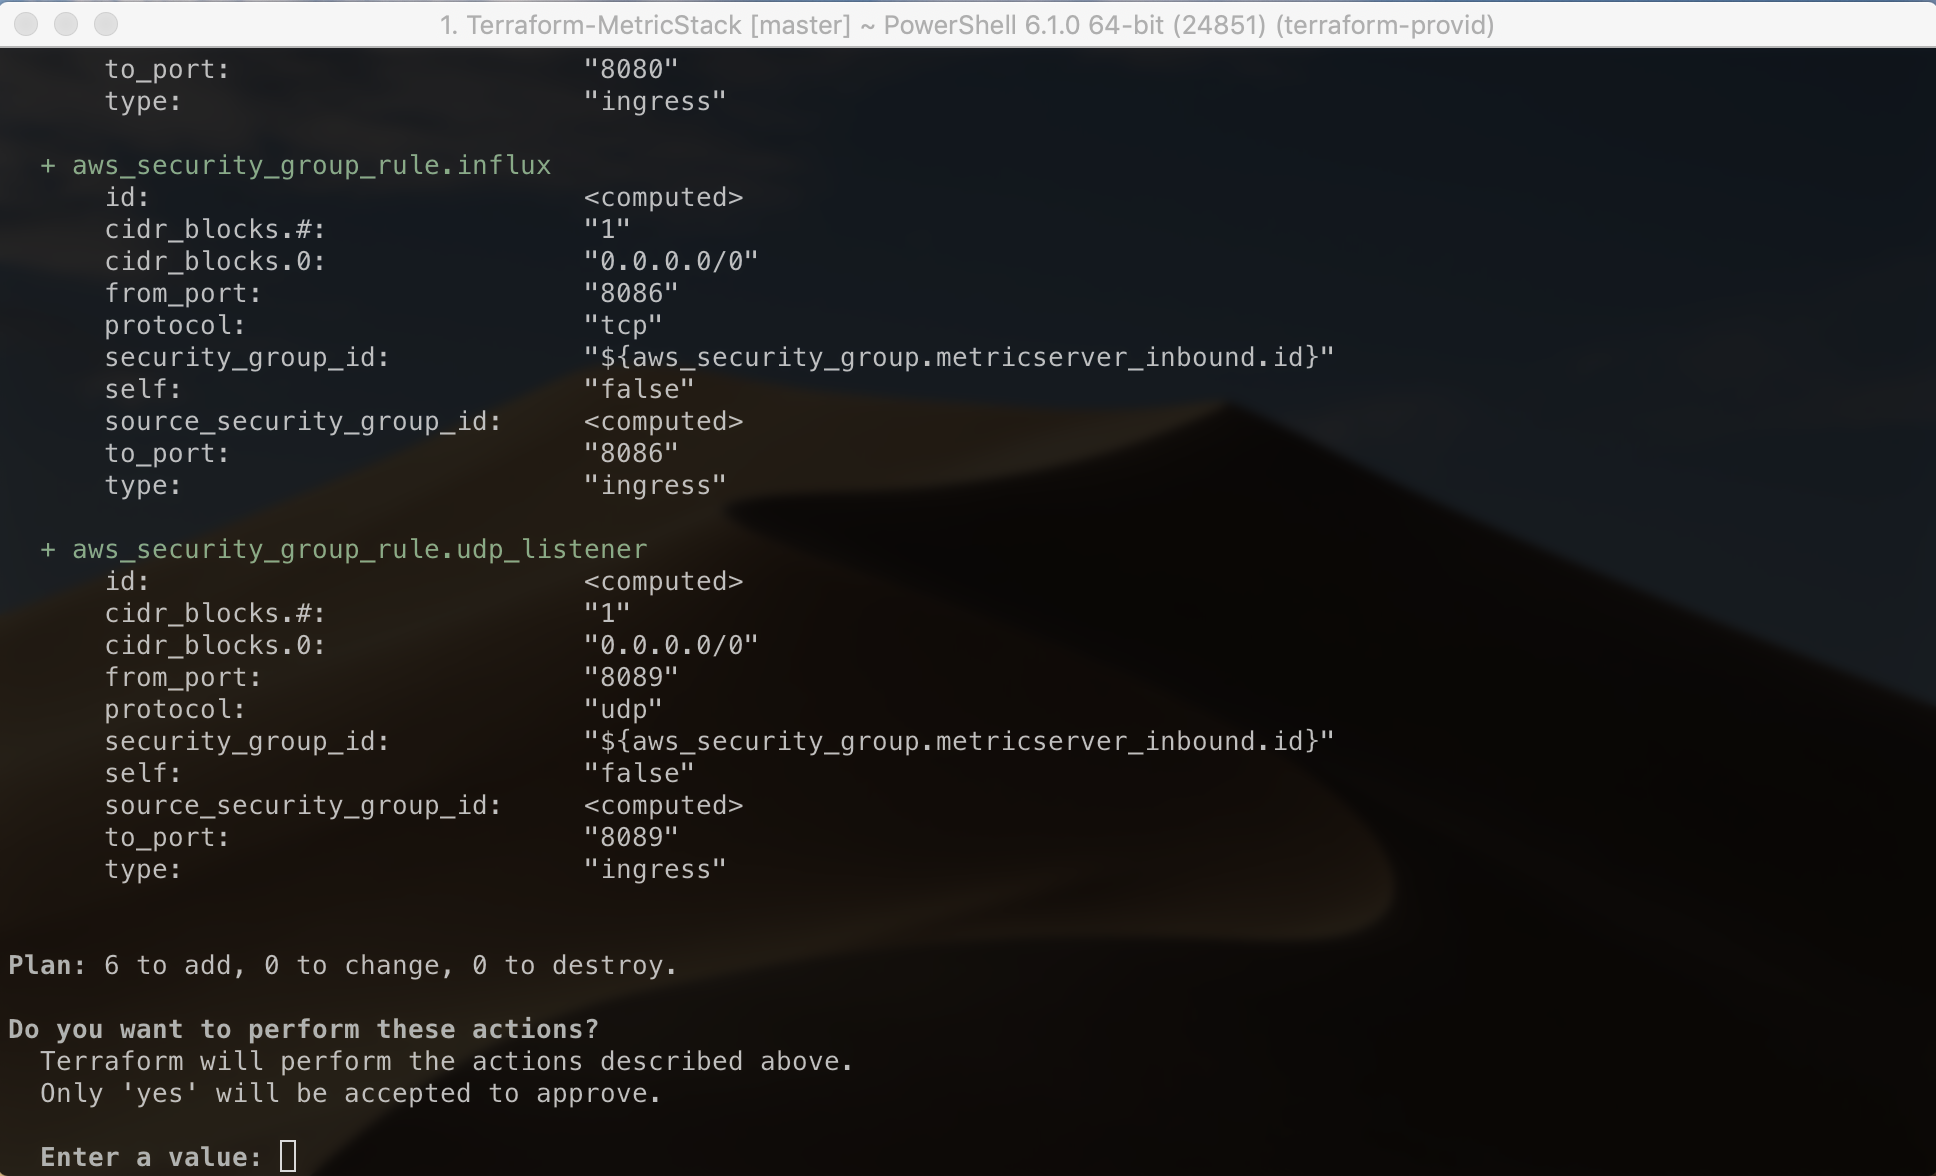
And here are the aws_security_group_rule resources. You can see that each is linked to the security group we defined. Some of the ports are also defined via variables (so someone can customise them if they want to) as well as the inbound CIDR blocks, which is ANY/Internet by default but someone might want to restrict access. Note also how some have a count parameter. This allows these rules to be enabled or disabled via one of the variables:
resource "aws_security_group_rule" "influx" {
  type              = "ingress"
  from_port         = "${var.influx_port}"
  to_port           = "${var.influx_port}"
  protocol          = "tcp"
  cidr_blocks       = ["${var.inbound_cidr_blocks}"]
  security_group_id = "${aws_security_group.metricserver_inbound.id}"
}

resource "aws_security_group_rule" "grafana" {
  type              = "ingress"
  from_port         = "${var.grafana_port}"
  to_port           = "${var.grafana_port}"
  protocol          = "tcp"
  cidr_blocks       = ["${var.inbound_cidr_blocks}"]
  security_group_id = "${aws_security_group.metricserver_inbound.id}"
}

resource "aws_security_group_rule" "rdp" {
  count             = "${var.enable_rdp ? 1 : 0}"
  type              = "ingress"
  from_port         = 3389
  to_port           = 3389
  protocol          = "tcp"
  cidr_blocks       = ["${var.inbound_cidr_blocks}"]
  security_group_id = "${aws_security_group.metricserver_inbound.id}"
}

resource "aws_security_group_rule" "udp_listener" {
  count             = "${var.enable_udp_listener ? 1 : 0}"
  type              = "ingress"
  from_port         = "${var.influx_udp_port}"
  to_port           = "${var.influx_udp_port}"
  protocol          = "udp"
  cidr_blocks       = ["${var.inbound_cidr_blocks}"]
  security_group_id = "${aws_security_group.metricserver_inbound.id}"
}

resource "aws_security_group_rule" "default_egress" {
  type              = "egress"
  from_port         = 0
  to_port           = 0
  protocol          = -1
  cidr_blocks       = ["0.0.0.0/0"]
  security_group_id = "${aws_security_group.metricserver_inbound.id}"
}
That’s all the Terraform code. As mentioned, there are lots of variables in this code and those are all defined in variables.tf. You seemingly don’t have to put them in a separate file, but it is a common practice and doing so I think makes it easier for someone using the code to see what they can easily configure. You don’t have to reference this file anywhere, when Terraform runs it processes all .tf files in the current directory.
Variables in Terraform can have a default, or they can be defined without any value in which case it will prompt for one when you do terraform apply. Here’s my variables.tf file:
variable "admin_password" {}

variable "aws_region" {
  default = "us-west-2"
}

variable "windows_ami_filter" {
  default = "Windows_Server-2016-English-Core-Base*"
}

variable "instance_type" {
  default = "t2.micro"
}

variable "grafana_port" {
  default = 8080
}

variable "influx_port" {
  default = 8086
}

variable "influx_database" {
  default = "metrics"
}

variable "inbound_cidr_blocks" {
  default = ["0.0.0.0/0"]
}

variable "grafana_version" {
  default = "5.3.2"
}

variable "influx_version" {
  default = "1.6.4"
}

variable "influx_udp_port" {
  default = 8089
}

variable "influx_udp_database" {
  default = "udp"
}

variable "enable_rdp" {
  default = false
}

variable "enable_udp_listener" {
  default = true
}
While you could just modify variables.tf to change these, a better option is to create a terraform.tfvars file. Again, Terraform will discover this automatically where it exists and any variables you define in it will populate variables or override the default values. For example, If I put this in a terraform.tfvars file:
admin_password = "MyPassword1234!
grafana_port = 80
enable_rdp = true
It won’t have to prompt me for an admin_password, it would use Port 80 for Grafana and it would add a AWS security rule that allows me to RDP to the server (disabled by default).
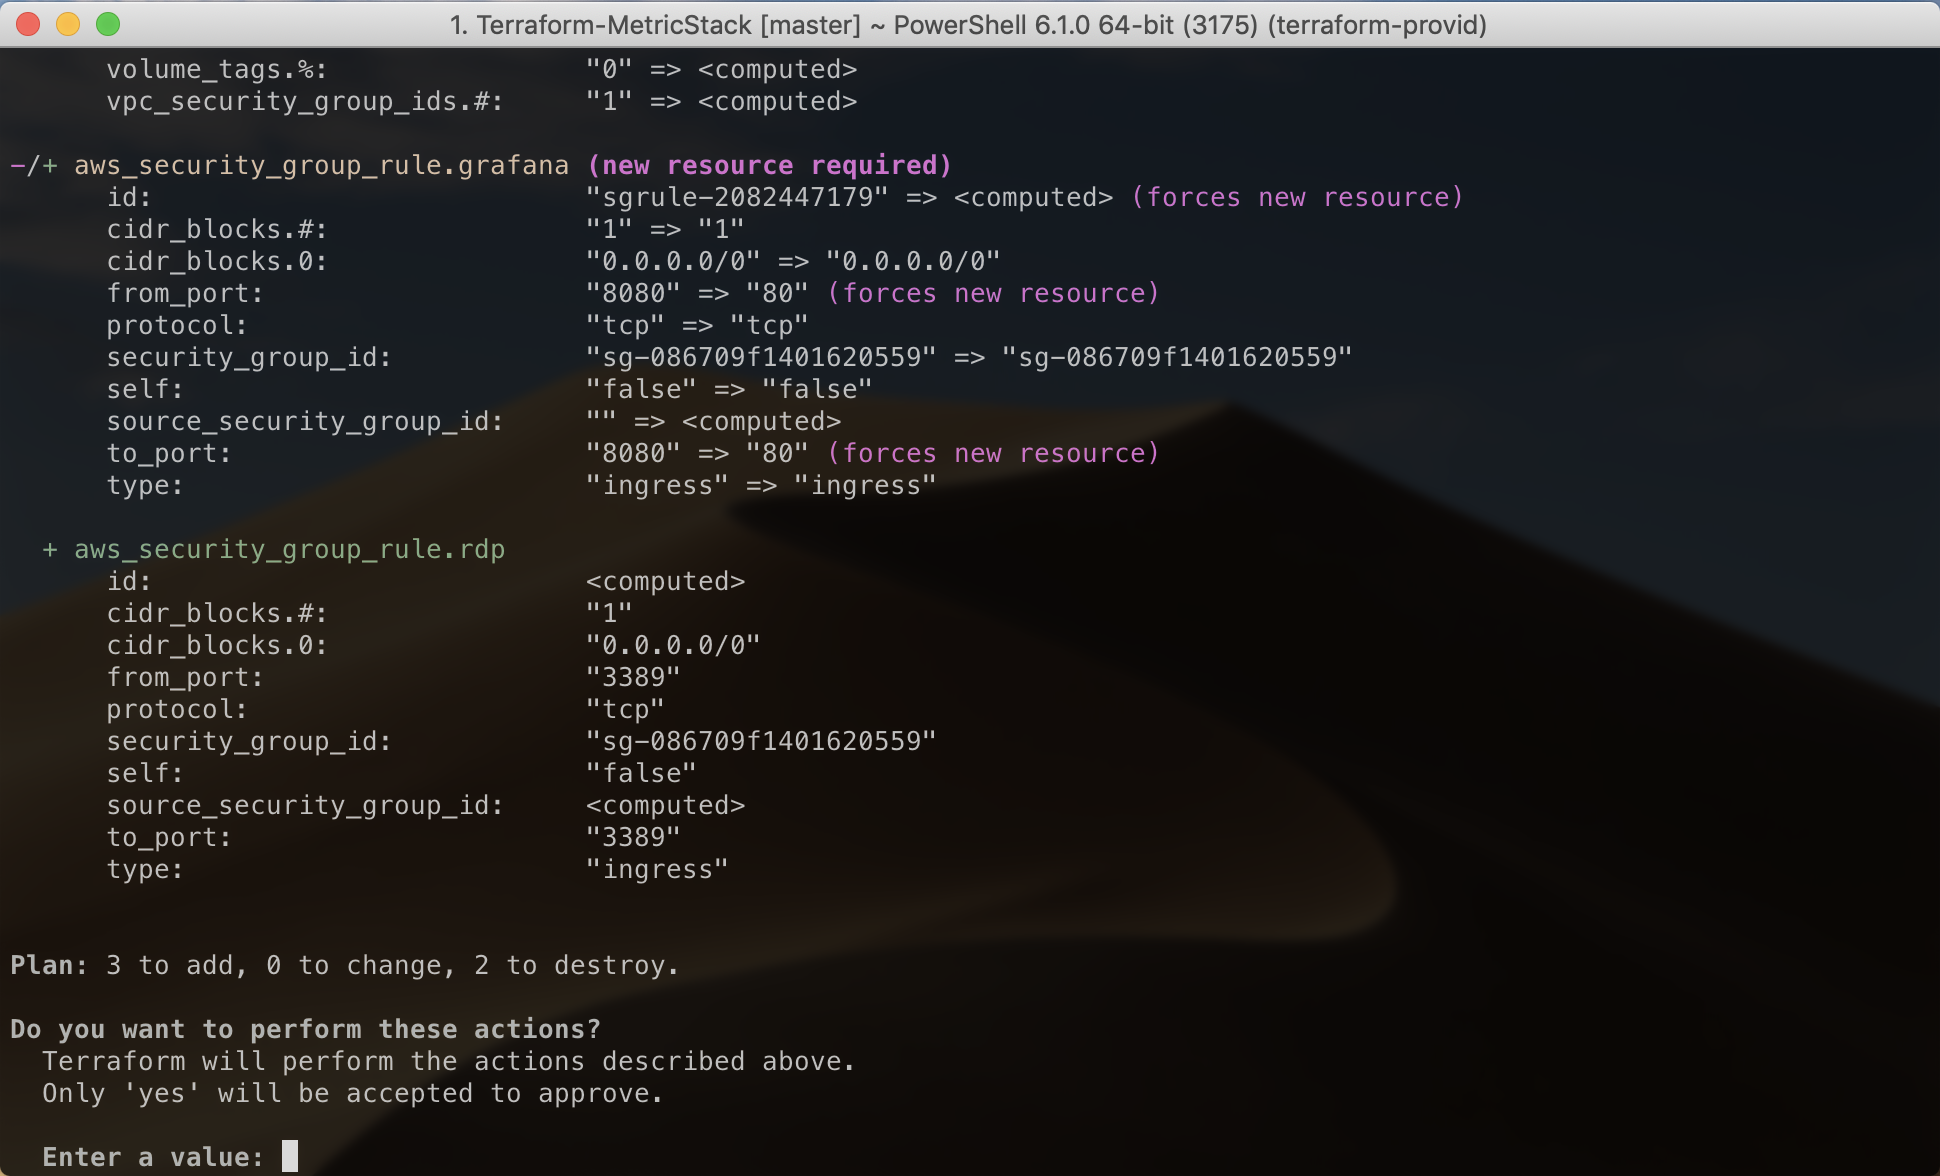
Note that if you’d already done a deployment with the defaults, then decided to set the above variables via a terraform.tfvars file and ran Terraform Apply, Terraform would make minimal changes to the AWS security group/rules (to enable RDP), but it would also show you that it has to destroy and recreate the AWS instance (it will say “forces new resource”) because in order to change the admin password and Grafana port on the server it knows it has to change the user_data which is only applied when the resource is first deployed:
It’s for this reason that having a configuration management tool to manage the server settings (the setup of which you could bootstrap via user_data) is often a better option as you can then make application or other host-level config changes without entirely rebuilding the server.
Keep sensitive config out of source control
If you make use of a
terraform.tfvarsfile, you might populate it with sensitive settings (like credentials) that you don’t want to exist anywhere else but locally. If you check your code into source control, you could use a.gitignorefile to ensure files like this aren’t committed.There are other Terraform files that you might not want to bother checking in to source control and you can find a template for a standard .gitignore for Terraform here.
The final terraform file in my code is outputs.tf. This simply defines what values we want to return to the user after they execute Terraform Apply and is how we output the Grafana and Influx URLs. You can see how those are built from multiple variables, so if the user overrides things like the default ports, the output will still be correct. Its also getting the Public IP from the AWS Instance, which means we can discover this without having to go into the AWS console to find it:
output "grafana_url" {
  value = "http://${aws_instance.metricserver.public_ip}:${var.grafana_port}"
}

output "influx_url" {
  value = "http://${aws_instance.metricserver.public_ip}:${var.influx_port}"
}
The only other file that makes up this solution is the metricserver.tpl file that contains the user_data script executed when the instance is first deployed. I won’t cover this in detail but you can view it here. It does the following:
- Installs Chocolatey.
- Sets the Local Administrator account password to whatever you define for the
admin_passwordvariable. - Uses chocolatey to install nssm (the Non-Sucking Service Manager) so that we can run Influx and Grafana as services.
- Downloads and extracts Grafana, then modifies its config file so its running on whatever port is defined via the variable.
- Downloads and extracts Influx, then modifies its config as needed. Optionally adds a UDP listener to Influx if we’ve enabled it via the variable (it is enabled by default).
- Adds local Windows Firewall rules for the Influx and Grafana ports.
- Installs Influx and Grafana as a service and starts them.
Summary
For me, this has been an interesting and illuminating first attempt at Terraform. I personally quite like the way the code is structured and it’s not too difficult to read a .tf file and understand what infrastructure is being defined. By using variables you can make it easier for others to set or override default settings which makes the code more reusable. However, there are some interesting complexities (for example: making some of the security group rules optional based on boolean variables took a while to figure out as there’s no way to do it if you define the rules within the security group resource vs as separate resources).
Terraform is still undergoing a lot of change and it’s intentionally not reached version 1.0 yet. While you can find a lot of guidance online, because of the rate of change it does tend to go out of date quickly. Overall though I think Terraform is a valuable and impressive tool and I’m looking forward to doing more with it.


Comments